.svg)
For Independent Contractors
Articles relevant for independent contractors.


General
See All Articles
 5 mins
How does Payoneer work?
Payoneer is the payment platform used by Playroll to ensure that contractors receive payment for their invoices in a timely manner. Contractors must first create their Payoneer account and link it to their Playroll profile before they can receive payments.
Advantages of Using Payoneer
- Automated Payments: Payoneer allows for seamless payment processing to contractors.
- Global Reach: Contractors can receive payments in multiple currencies and transfer funds from their Payoneer account to their local bank account. If they have a Payoneer Prepaid Mastercard, they can also withdraw funds from an ATM that accepts Mastercard.
- No Fees for Payoneer-to-Payoneer Transfers: if both
- Tax Administration: Payoneer supports various tax forms and automated record-keeping for easier compliance.
Disadvantages of Using Payoneer
- Fees: Contractors incur fees based on how they withdraw money. These fees can be up to 2% for currency conversion when withdrawing to a local bank account in a different currency (https://www.nerdwallet.com/reviews/small-business/payoneer, https://blog.payoneer.com/how-to/access-funds/payoneer-withdrawal-fees/)
- Account Maintenance Fee: Inactive accounts that receive less than $2,000 annually incur a $29.95 maintenance fee (https://www1.payoneer.com/in/about/fees/ )
- Exchange Rate Markups: When using the Payoneer Mastercard, a currency conversion fee of up to 3.5% applies (https://wise.com/us/blog/payoneer-vs-hyperwallet ).
5 mins
Understanding Responsibility for Transaction Fees
Check clause 2.2 of your contract to see if transaction fees are covered by the client or the contractor—Playroll does not decide this.
Understanding Transaction Fee Responsibility
Clients have the option to cover transaction fees incurred during the invoicing process. However, if the client chooses not to cover these costs, it is the contractor’s responsibility to manage the fees. Playroll does not influence or intervene in this agreement.
To confirm who is responsible for transaction fees in your case, please refer to clause 2.2 of your contract. This clause outlines the financial obligations agreed upon between you and the client.
 5 mins
How to Manage Contractor Transaction Fee Coverage
Clients can cover contractor fees by default during payment. Uncheck the box if you want the contractor to absorb transaction costs.
Covering Contractor Transaction Fees at Payment
By default, the option to cover transaction fees incurred by a contractor is selected on the final payment screen. This is indicated by the checked box shown below.
If you prefer not to cover the contractor’s transaction and foreign exchange fees, simply deselect the checkbox. In this case, the contractor will bear all related charges.
Contractor Invoicing & Adjustments
See All Articles
5 mins
How to Upload Your Contractor Invoice
Learn how to upload your contractor invoice on Playroll, from accessing the Invoices tab to submitting and confirming the final amount.
Contractor Invoice Upload Guide
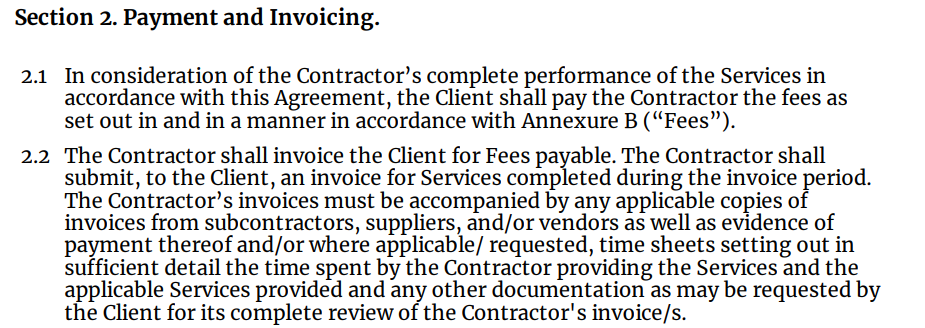
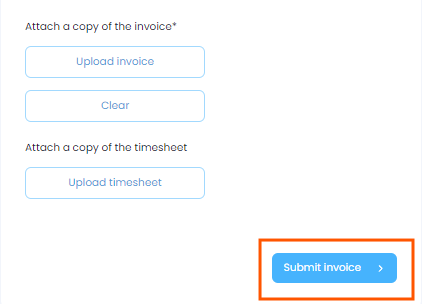
✅ Step 1: Go to the Invoices Tab
From your dashboard, click on the Invoices tab to begin the invoice upload process.
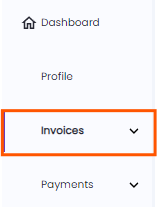
✅ Step 2: Select New Invoice
Navigate to the New Invoice sub-tab to create a new invoice entry.
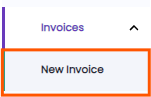
✅ Step 3: Enter Invoice Details and Upload
Fill in the required invoice details in the Invoice Details section. Upload your invoice file so it can be reviewed by your client.
✅ Step 4: Submit the Invoice
After completing all fields and uploading the invoice, click Submit Invoice at the bottom right of the screen.
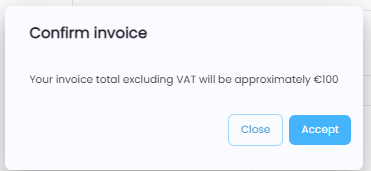
✅ Step 5: Confirm Invoice Amount
If the invoice upload is successful, a confirmation screen will appear displaying the total invoice amount. Review it carefully.
✅ Step 6: Accept and Finalize
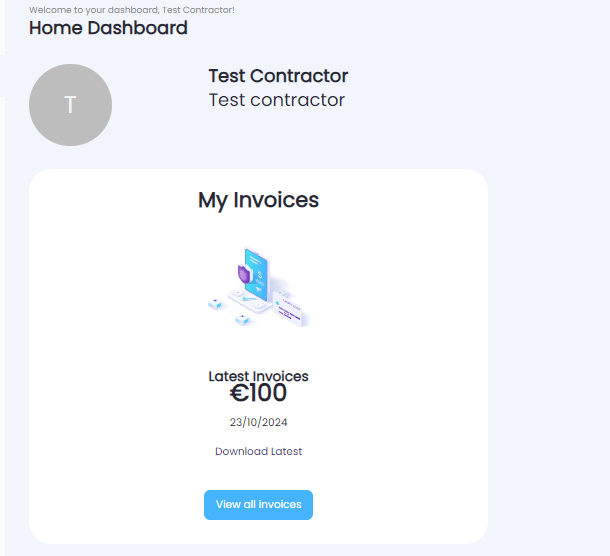
Accept the displayed amount to finalize your invoice submission. You will then be redirected to your homepage, and the invoice will also become visible on your client’s platform.
5 mins
Uploading Your Invoice for Client Review and Payment
Upload your contractor invoice by selecting "New Invoice" on your dashboard, completing the form, and submitting it for client review.
How to Upload a Contractor Invoice
✅ Step 1: Access the Invoices Tab
From your dashboard, click on the "Invoices" tab.
✅ Step 2: Select “New Invoice”
Click on the "New Invoice" sub-category to begin the upload process.
✅ Step 3: Complete Invoice Details
The "Invoice Details" section will open. Fill in all required fields and upload your invoice file.
✅ Step 4: Submit the Invoice
Once all details are filled out, click "Submit Invoice" at the bottom right of the screen.
✅ Step 5: Confirm Invoice Amount
If your upload was successful, a notification showing the invoice total will appear.
✅ Step 6: Accept and Finalize
If the amount is correct, select "Accept". You’ll be redirected to your homepage and the invoice will be shared with your client.
Withdrawals
See All Articles
5 mins
Contractor Payments via Payoneer
Contractors are paid via Payoneer only. No manual payments are supported—contact us if you have issues with your Payoneer account.
Contractor Payments via Payoneer
All contractors on our platform are paid exclusively through Payoneer. Manual payment methods are not supported. If you experience any issues with Payoneer, please contact us as soon as possible so we can assist.
Payoneer offers several benefits, including the ability to receive payments in multiple currencies, transfer funds to local bank accounts or ATMs, and access automated tax forms and record-keeping for easier compliance.
5 mins
Linking Your Payoneer Account to Playroll
To receive payments via Playroll, your Payoneer account must be linked and verified. Follow the steps below to complete the connection process.
Steps to Link Payoneer to Your Playroll Profile
Step 1: Initial Prompt on First Login
After activating your Playroll account, your first login will prompt you to create or connect a Payoneer account. You must complete this step before submitting invoices on the platform.
Step 2: Login or Sign Up for Payoneer
If you already have a Payoneer account, click "Login to Payoneer". If you're new to Payoneer, select "Sign Up" and complete the registration steps to create your account.
Step 3: Account Pending Verification
After logging in or creating your account, your Payoneer status will show as “Pending Verification” in the Playroll portal. You can track this status by navigating to your "Payment Settings".
Step 4: Payoneer Account Linked and Active
Once approved, your Payoneer account status will update to "Active" in your Playroll profile. You can now submit invoices and receive payments.
5 mins
Understanding Payoneer Transaction Fees
Contractors may face fees when using Payoneer. Clients can cover these fees, which include a 2.5% FX fee and a $3 USD transaction fee.
When processing contractor invoices through Payoneer, transaction fees may apply. Clients have the option to cover these fees at the time of invoice review. If selected, the fee amount is automatically added to the total invoice value, ensuring the contractor receives the full invoiced amount after deductions.
Fee Structure Overview
Typically, the additional fee added for clients who opt to cover Payoneer's charges includes:
- A fixed fee of 2.5% for currency exchange (FX)
- A flat transaction fee of $3 USD
This helps contractors avoid losing part of their payment due to processing fees.
What Happens If Clients Do Not Cover the Fee?
If the client chooses not to cover Payoneer’s transaction fees, the fees will be deducted from the total payment received by the contractor. This means the contractor will receive less than the full invoiced amount.
Best Practices
- Clients should clearly communicate with contractors about fee responsibilities before processing payments.
- Contractors should review payment receipts to confirm the final amount received after deductions.

Can’t Find What You’re Looking For?
Contact our support team - we’re always here to help! Log in to chat instantly or submit a ticket for a prompt response.