.svg)


 5 mins
How to Upload Your Contractor Invoice
Learn how to upload your contractor invoice on Playroll, from accessing the Invoices tab to submitting and confirming the final amount.
Contractor Invoice Upload Guide
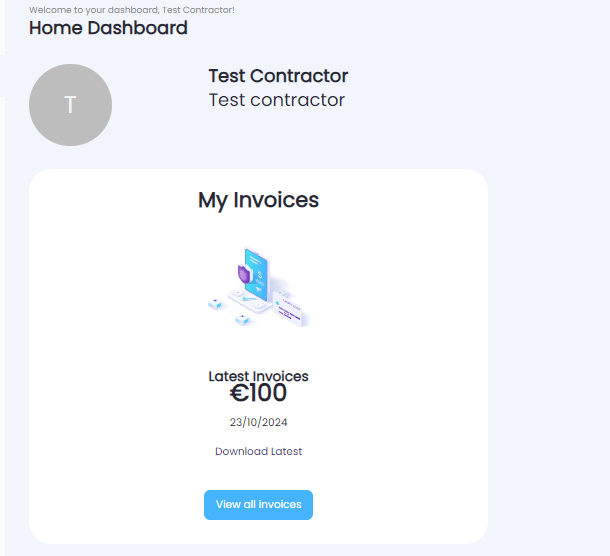
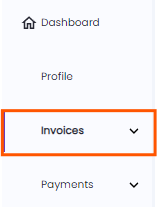
✅ Step 1: Go to the Invoices Tab
From your dashboard, click on the Invoices tab to begin the invoice upload process.
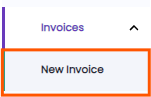
✅ Step 2: Select New Invoice
Navigate to the New Invoice sub-tab to create a new invoice entry.
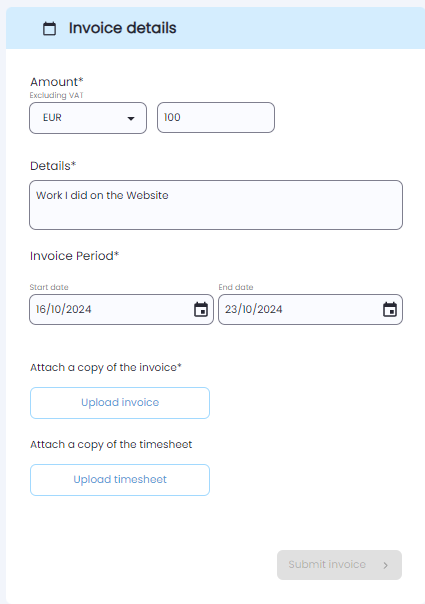
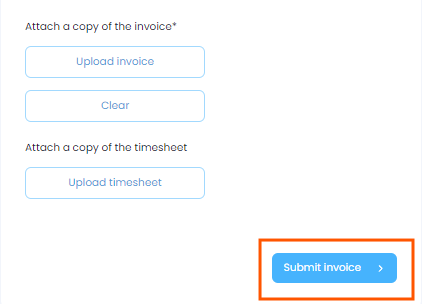
✅ Step 3: Enter Invoice Details and Upload
Fill in the required invoice details in the Invoice Details section. Upload your invoice file so it can be reviewed by your client.
✅ Step 4: Submit the Invoice
After completing all fields and uploading the invoice, click Submit Invoice at the bottom right of the screen.
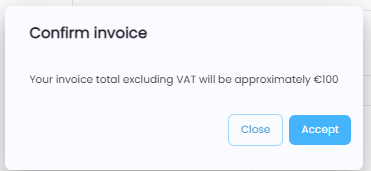
✅ Step 5: Confirm Invoice Amount
If the invoice upload is successful, a confirmation screen will appear displaying the total invoice amount. Review it carefully.
✅ Step 6: Accept and Finalize
Accept the displayed amount to finalize your invoice submission. You will then be redirected to your homepage, and the invoice will also become visible on your client’s platform.
5 mins
Uploading Your Invoice for Client Review and Payment
Upload your contractor invoice by selecting "New Invoice" on your dashboard, completing the form, and submitting it for client review.
How to Upload a Contractor Invoice
✅ Step 1: Access the Invoices Tab
From your dashboard, click on the "Invoices" tab.
✅ Step 2: Select “New Invoice”
Click on the "New Invoice" sub-category to begin the upload process.
✅ Step 3: Complete Invoice Details
The "Invoice Details" section will open. Fill in all required fields and upload your invoice file.
✅ Step 4: Submit the Invoice
Once all details are filled out, click "Submit Invoice" at the bottom right of the screen.
✅ Step 5: Confirm Invoice Amount
If your upload was successful, a notification showing the invoice total will appear.
✅ Step 6: Accept and Finalize
If the amount is correct, select "Accept". You’ll be redirected to your homepage and the invoice will be shared with your client.